Whether you’re taking your property photos yourself or leaving it to an estate agent, understanding the correct way to photograph your property can benefit you and the sale of your home. There are many different aspects that go into taking the perfect property photo, and these aspects can be the difference between a potential buyer skipping past your property on Rightmove, and visiting your property for a viewing!
Preparation
Before the camera is even out of the bag, the first thing you should do is prepare the rooms that you will be photographing. Keeping them tidy and clear of clutter will make the room look larger, whilst adding flowers and potted plants will add colour to the room and make your home look warmer and welcoming. Also experiment with the furniture and layout of the room, thinking about which positions would be best to shoot from. Remember that once your house is online and on the market, anyone can view the photos. So keep any valuables, keys, and personal affects out of sight.
Lighting
The lighting of the room is one of the key elements to property photography. Each room is different and may need a different approach, but there are fundamentals that apply to all. Keep curtains and blinds open to allow as much natural light into the room as possible. For many rooms this won’t be sufficient, so you may need to add artificial light to the room. Lamps and ceiling lights are good for illuminating dark corners and adding depth to the room. Many property photographers will also use a flashgun attached to the camera. If you’re using a flashgun, keep it aimed upwards so it bounces light off the ceiling, creating an evenly lit room.
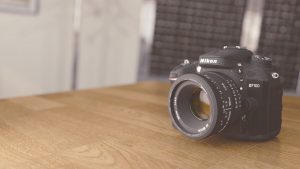
Camera set-up
For the best results possible you will need to use a DSLR camera with a wide-angle lens. Avoid using fisheye lenses as these can create a distorted and unrealistic view of the room. You will also need to use a tripod as this will give you time to find the perfect composition, as well as keeping your images crisp and sharp. You will need at minimum a basic knowledge of how the settings on your camera work and affect the image. Keep the ISO as low as possible to avoid grain, the aperture should be set to around f/8 so that the entire room is in focus, and the shutter speed should be around 60.
Composition
The next step is to find the right view point for the room. Usually, this will be from one corner shooting into the far corner. However, any position that conveys the space of the room is ideal. Most rooms should be shot from below eye level, anywhere from waist level to chest level, depending on the room. For example, kitchens will usually be shot from chest level so you can fully capture the high cabinets. Whereas, bathrooms will often be shot from lower down, as the features are closer to the ground. Finally, most tripods will have a spirit level. Use this to ensure that your camera is horizontally level. This is essential if you’re photographing a room with a lot of vertical lines.
Follow these steps and you should see instant improvements with your property photography. However, with most things in life, practice makes perfect. So pick up your camera and start snapping away!
If you’re thinking of buying or selling, or would like to know the value of your home, get in touch with Norfolk Property Online. We can be reached on 01603 300900 or by email: [email protected]


Recent Comments